Chatworkとの連携に関するプログラム開発については、Chatwork APIのドキュメンテーションを学ぶことで、様々な機能を活用できます。
この記事では、ReactとNextJSを利用してChatworkグループにメッセージを送信する方法に焦点を当てています。
必要な前提条件
- Chatworkアカウント: Chatwork Group Chatにメッセージを送信するには、まずChatworkのアカウントが必要です。
アカウントをお持ちでない場合は、こちらでアカウントを作成してください。
- Chatworkグループチャット: 通知を送るためには、Chatworkグループを作成します。
グループの作成方法が不明な場合は、こちらを参考にしてください。
- ChatworkAPIの理解:ChatworkAPIの使い方については、こちらを参照してください。
Chatwork APIについて
Chatwork APIは外部のプログラムから容易に使用でき、Chatworkで発生したイベントを外部のプログラムに提供できます。
Chatwork APIを活用したプログラムの開発、またはIFTTTやZapierなどのiPaaSを使用することで、以下のような連携が可能になります。
- 自分宛てにメールが届いたらChatworkにメッセージとして転送する
- サーバーエラーを検知し関係者にタスクを振る
- カレンダーに予定が追加されたら、Chatworkでタスクを振る
※エンドポイント、メッセージ記法、OAuth 2.0、Webhookなどの詳細については、Chatwork公式ページをご参照ください。
実装方法
- APIトークンの取得
- chatworkの画面右上のプロフィールをクリックし、「サービス連携」をクリックします。
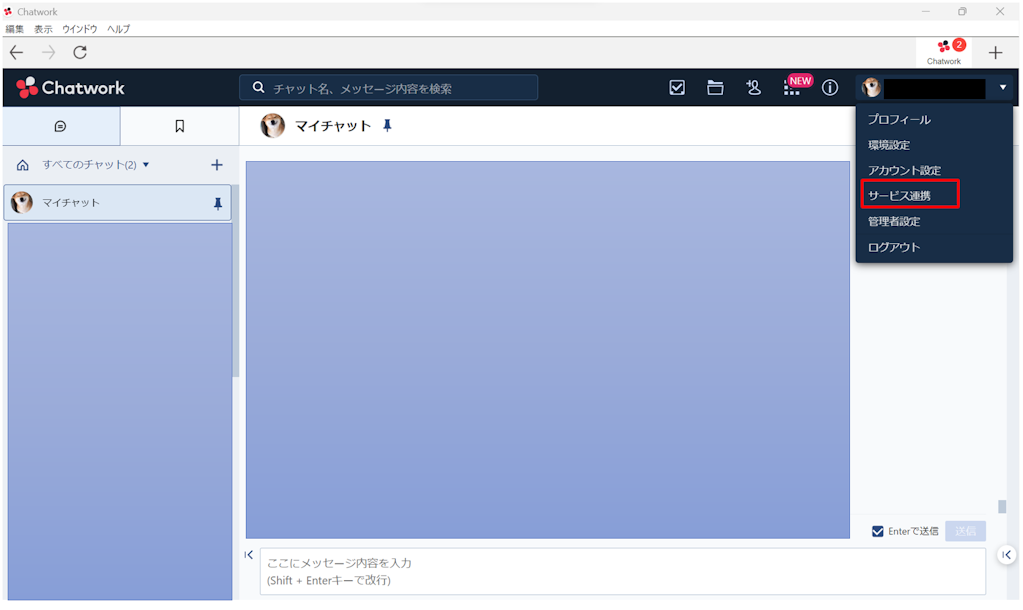
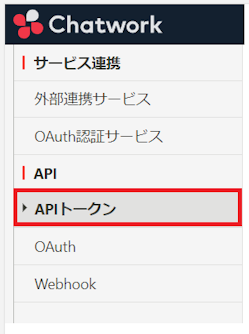
- 左のメニューバーから「API Token」をクリックしてください。
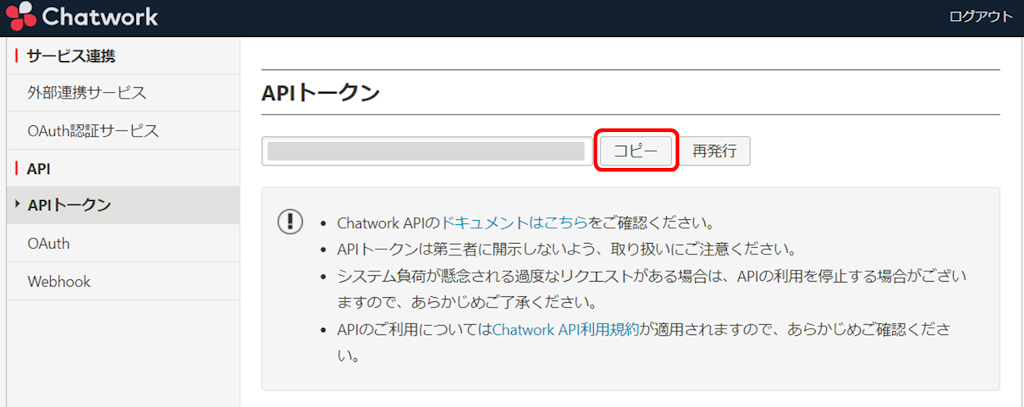
- 「API Token」をコピーします。
- chatworkの画面右上のプロフィールをクリックし、「サービス連携」をクリックします。
- ルームIDを取得する。
- ルームIDを取得したいグループチャットに移動します。
グループチャットの歯車をクリックして、「グループチャットの設定」を選択してください。

- グループチャットの詳細情報が表示されます。
画面下部の「ルームID」をコピーします。

- ルームIDを取得したいグループチャットに移動します。
- プログラムで実装
- Next.js Appを作成
npx create-next-app my-next-app -e with-typescript - layout.tsxにnavを追加
import React, { ReactNode } from "react"; import Link from "next/link"; import Head from "next/head"; type Props = { children?: ReactNode; title?: string; }; const Layout = ({ children, title = "This is the default title" }: Props) => ( <div> <Head> <title>{title}</title> <meta charSet="utf-8" /> <meta name="viewport" content="initial-scale=1.0, width=device-width" /> </Head> <header> <nav> <Link href="/">Home</Link> |{" "} <Link href="/chatwork">Chatwork</Link> </nav> </header> {children} </div> ); export default Layout; - フロント画面を作成(chatwork.tsx)
pages/chatwork.tsx
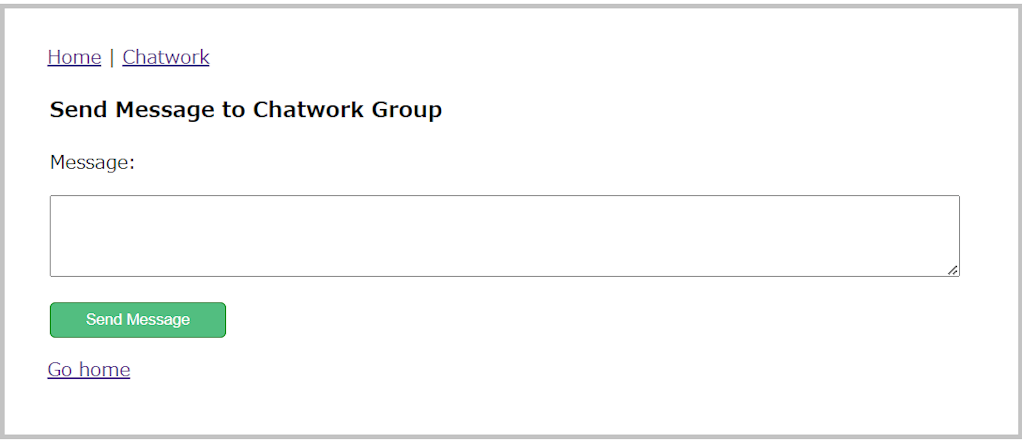
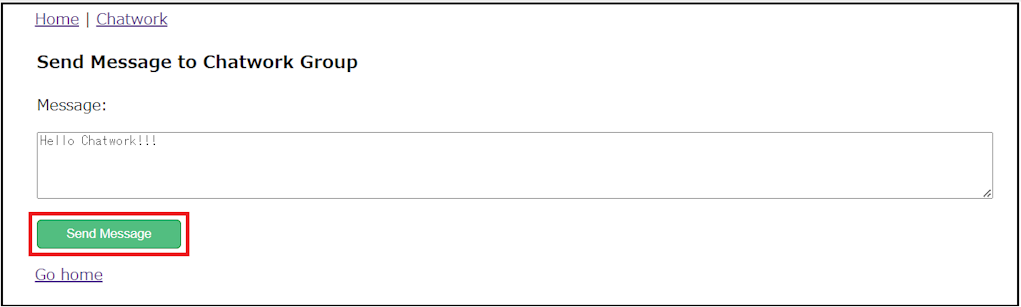
import Link from "next/link";
import Layout from "../components/Layout";
import styled from "styled-components";
import React, { useState, ChangeEvent } from "react";

const MessageContainer = styled.div`
  margin: 10px 10px 10px 40px;
  height: auto;
  width: auto;
`;

const Label = styled.label`
  font-size: 16px;
  font-weight: 500;
`;

const MessageBox = styled.textarea`
  width: 50%;
  margin: 15px 15px 15px 0px;
`;

const SendButton = styled.button`
  width: 150px;
  height: 30px;
  color: #ffffff;
  background-color: #52be80;
  border-radius: 5px;
  border: 1px solid green;
`;

const ErrorMessage = styled.div`
  margin: 15px 0px 0px 0px;
`;

const BackLink = styled.p`
  margin-left: 38px;
`;

function ChatworkPage() {
  const [message, setMessage] = useState("");
  const [statusMessage, setStatusMessage] = useState<string | null>();

  const handleMessageChange = (event: ChangeEvent<HTMLTextAreaElement>) => {
    setMessage(event.target.value);
  };

  const handleSendMessage = () => {
    if (message !== null) {
      sendMessageToChatwork(message);
    }
  };

  const sendMessageToChatwork = async (content: string) => {
    console.log(`content: ${content}`);
  };

  return (
    <Layout title="Chatwork | Next.js + TypeScript Example">
      <MessageContainer>
        <h3>Send Message to Chatwork Group</h3>
        <Label>Message:</Label>
        <br />
        <MessageBox
          rows={5}
          value={message}
          onChange={handleMessageChange}
        ></MessageBox>
        <br />
        <SendButton onClick={handleSendMessage}>Send Message</SendButton>
        {statusMessage && (
          <ErrorMessage className="error-top flash flash-error errmessage">
            {statusMessage}
          </ErrorMessage>
        )}
      </MessageContainer>
      <BackLink>
        <Link href="/">Go home</Link>
      </BackLink>
    </Layout>
  );
}

export default ChatworkPage;
シンプルな下記の画面が表示される。
- Chatworkにメッセージを送信するバックエンドの処理を作成(sendtoChatwork.ts)
pages/api/sendtoChatwork.ts
import type { NextApiRequest, NextApiResponse } from "next"; import axios, { AxiosResponse } from "axios"; import qs from "qs"; import resultInfo from "../../entity/result.json"; type ResultInfo = typeof resultInfo; export default async function sendtoChatwork( req: NextApiRequest, res: NextApiResponse ) { //POSTデータ取得 const content:any = req.body.content; //set post fields const params = qs.stringify({ body: content, self_unread: "1", }); //API token const token = '********************************'; //ルームID const room_id = '*********'; //Chatwork URL const url = `https://api.chatwork.com/v2/rooms/${room_id}/messages`; try { const ret: AxiosResponse<ResultInfo> = await axios.post( url, params, { headers: { Accept: "application/json", "Content-Type": "application/x-www-form-urlencoded", 'x-chatworktoken': token, }, withCredentials: true, } ); //if message is sent successfully,chatwork returns message-id if(ret.data != null){ res.status(200).json({status:200,message: "Chatworkグループにメセッジを送信しました!"}); }else{ res.status(299).json({status:299,message: "Chatworkグループにメセッジ送信が失敗しました!"}); } } catch (error) { console.log("res.status"); if ((error as Error).message == "Request failed with status code 400") { res .status(400) .json({ status:400,message: "リクエストパラメーターが不足している、および不正な値が指定されています!" }); } else if ((error as Error).message == "Request failed with status code 401"){ res .status(401) .json({ status:401,message: "API認証失敗しました!" }); } else if ((error as Error).message == "Request failed with status code 403"){ res .status(403) .json({ status:403,message: "チャットにメッセージを投稿する権限がありません!" }); } else if ((error as Error).message == "Request failed with status code 404"){ res .status(404) .json({ status:404,message: "ページが見つかりません!" }); }else if ((error as Error).message == "Request failed with status code 429"){ res .status(429) .json({ status:429,message: "APIの利用回数制限およびチャット単位のメッセージ・タスク投稿回数制限を超過した!" }); }else{ res .status(500) .json({ status:500,message: "内部サーバーエラーが発生しました!" }); } } } - レスポンスの型の為、result.jsonを追加
/entity/result.json
{ "status" : 0, "message" :"string", "error":"string" } - フロント側のメッセージ送信機能を編集
pages/chatwork.tsx
/* other imports */
import { FetchError } from "../lib/fetchError"

/* other functions */

const sendMessageToChatwork = async (content: string) => {
    const body = {
      content: content,
    };
    try {
      const response: Response = await fetch("/api/sendtoChatwork", {
        method: "POST",
        headers: { "Content-Type": "application/json" },
        body: JSON.stringify(body),
      });
      const result: ResultInfo = await response.json();
      setStatusMessage(result.message);
    } catch (error) {
      if (error instanceof FetchError) {
        setStatusMessage(error.data.message);
      } else {
        console.error("An unexpected error happened:", error);
      }
    }
  };
lib/fetchError.ts
export class FetchError extends Error { response: Response; data: { message: string; }; constructor({ message, response, data, }: { message: string; response: Response; data: { message: string; }; }) { // Pass remaining arguments (including vendor specific ones) to parent constructor super(message); // Maintains proper stack trace for where our error was thrown (only available on V8) if (Error.captureStackTrace) { Error.captureStackTrace(this, FetchError); } this.name = "FetchError"; this.response = response; this.data = data ?? { message: message }; } } - 画面からグループチャットにメッセージを送信します。
メッセージを入力して「Send Message」ボタンをクリックします。
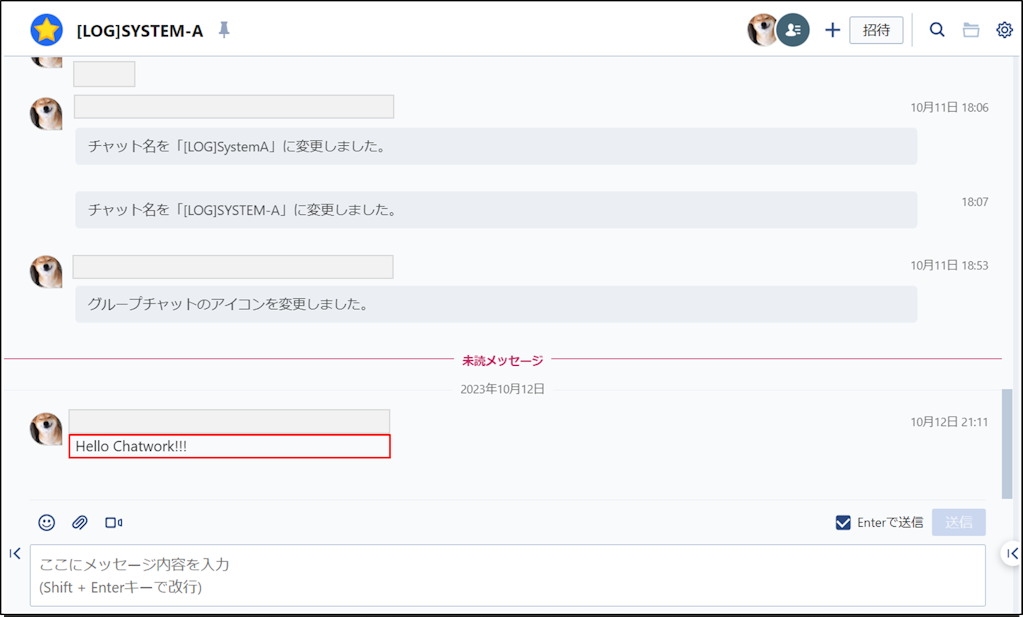
- グループチャットにメッセージを確認します。
メッセージ正常に送信されたことが確認できます。
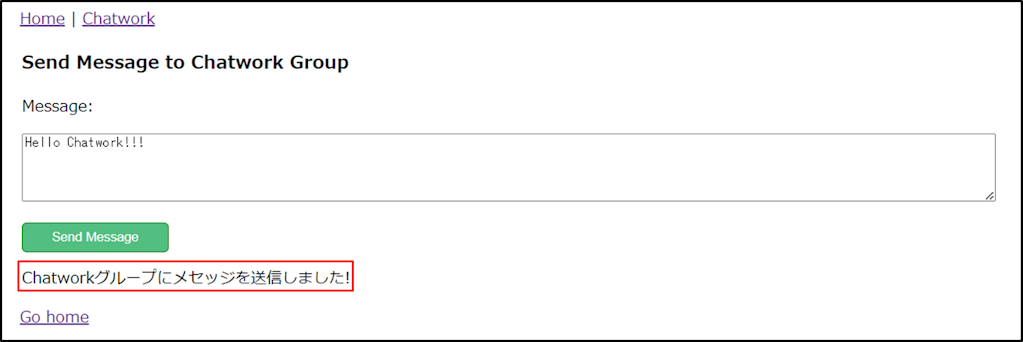
画面上にも送信成功/失敗の確認ができるように「ステータスメッセージ」を出力しています。
- 成功時
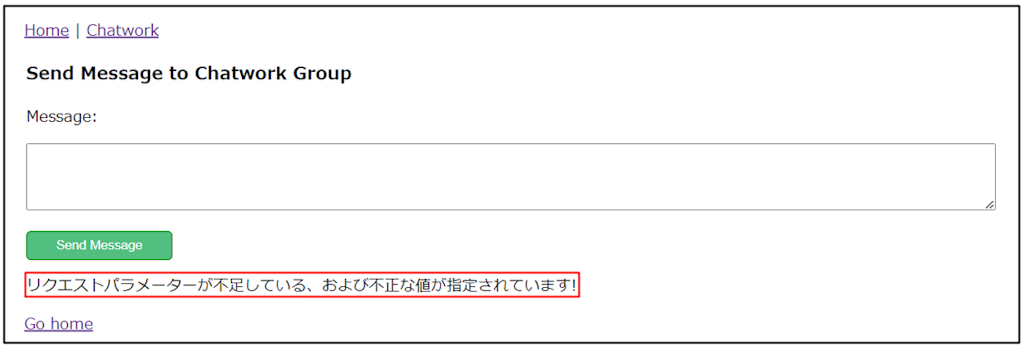
- 失敗時
失敗した場合、Errorの内容が表示されます。
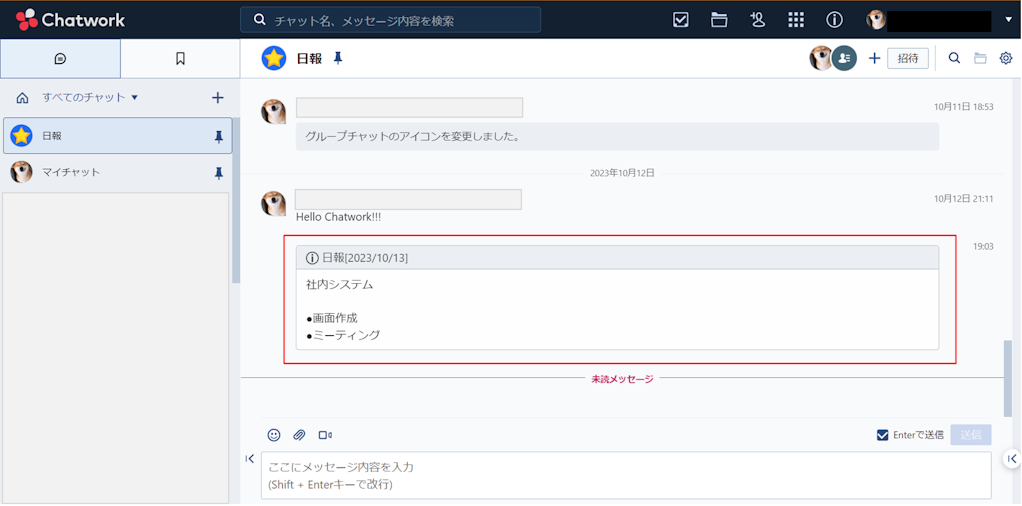
- メッセージにタイトルを付ける
タイトルを付ける為、contentに「title」を追加し、メッセージは「info」内に入れて送ります。
const sendMessageToChatwork = async (content: string) => {
    const currentDate = new Date();
    const formattedDate = currentDate.toLocaleDateString();
    content = `[info][title]日報[${formattedDate}][/title]${content}[/info]`;
    const body = {
      content: content,
    };
    try{
	//existing code here
    }catch{
	//existing code here
    }
}
普通に画面からメッセージを送信し、グループチャットを確認します。
下記の通りにタイトル付きメッセージが表示されます。
- Next.js Appを作成